How to set up our WooCommerce Plug-in
The BlockBee plugin extends WooCommerce, allowing you to get paid in crypto directly on your Store, with a simple setup and no sign-ups required.
In this page we will guide you throught he configuration and installation of our official WooCommerce Plug-in.
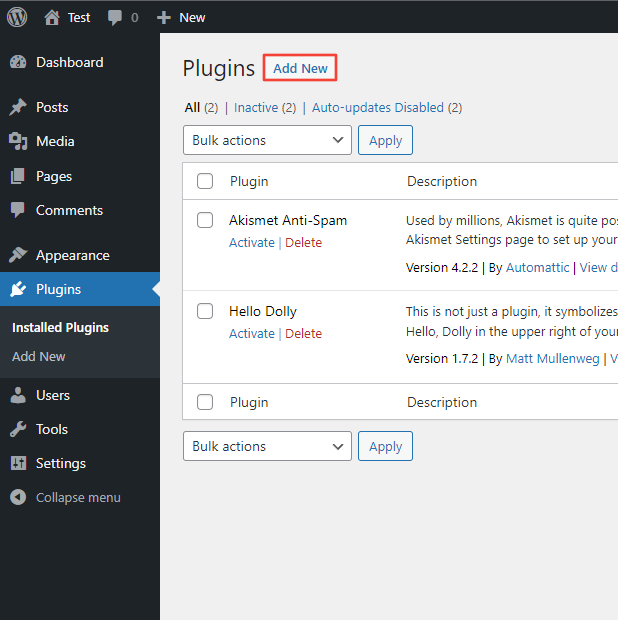
1. First you need to have WooCommerce installed. Then you go to "Plugins".

2. In the "Plugins" page click the "Add New" button.
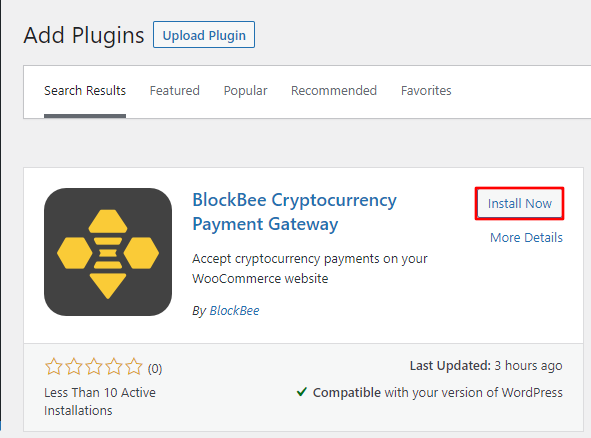
3. Type "BlockBee" in the search input and when our plug-in appear in the search result, click "Install Now". Then just wait for WordPress to finish installing it.
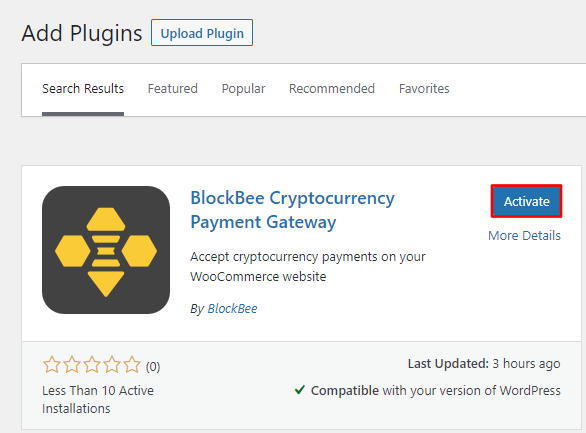
4. When WordPress finish installing BlockBee plug-in, click "Activate".
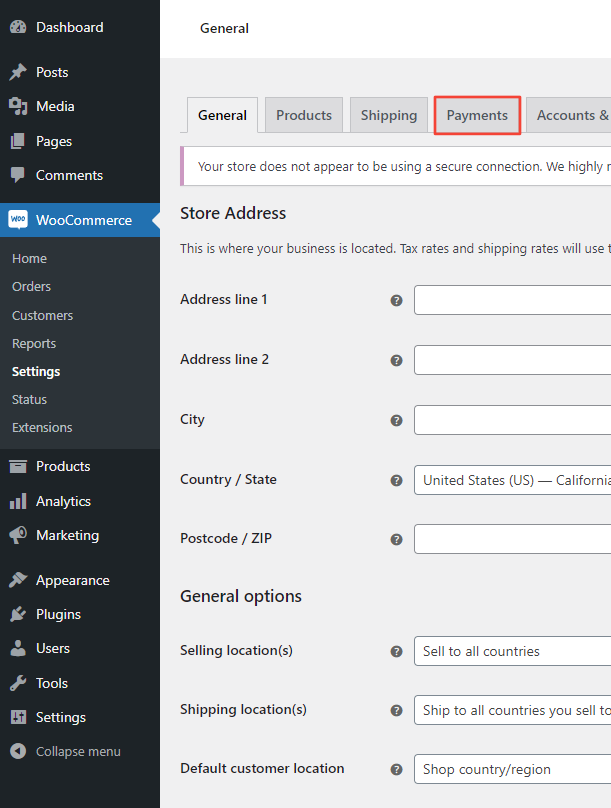
5. Then go to WooCommerce and click the "Settings" link.
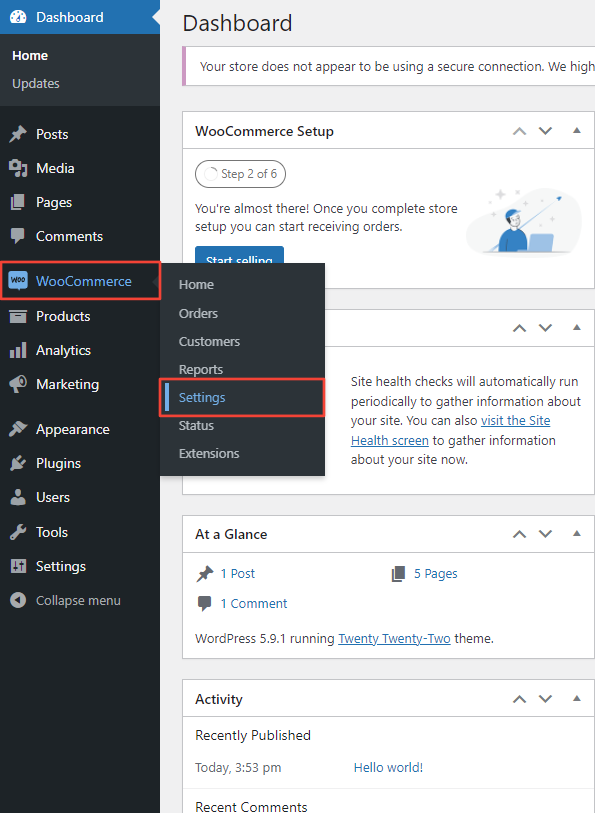
6. In the WooCommerce "Settings" page click in the "Payments" button.
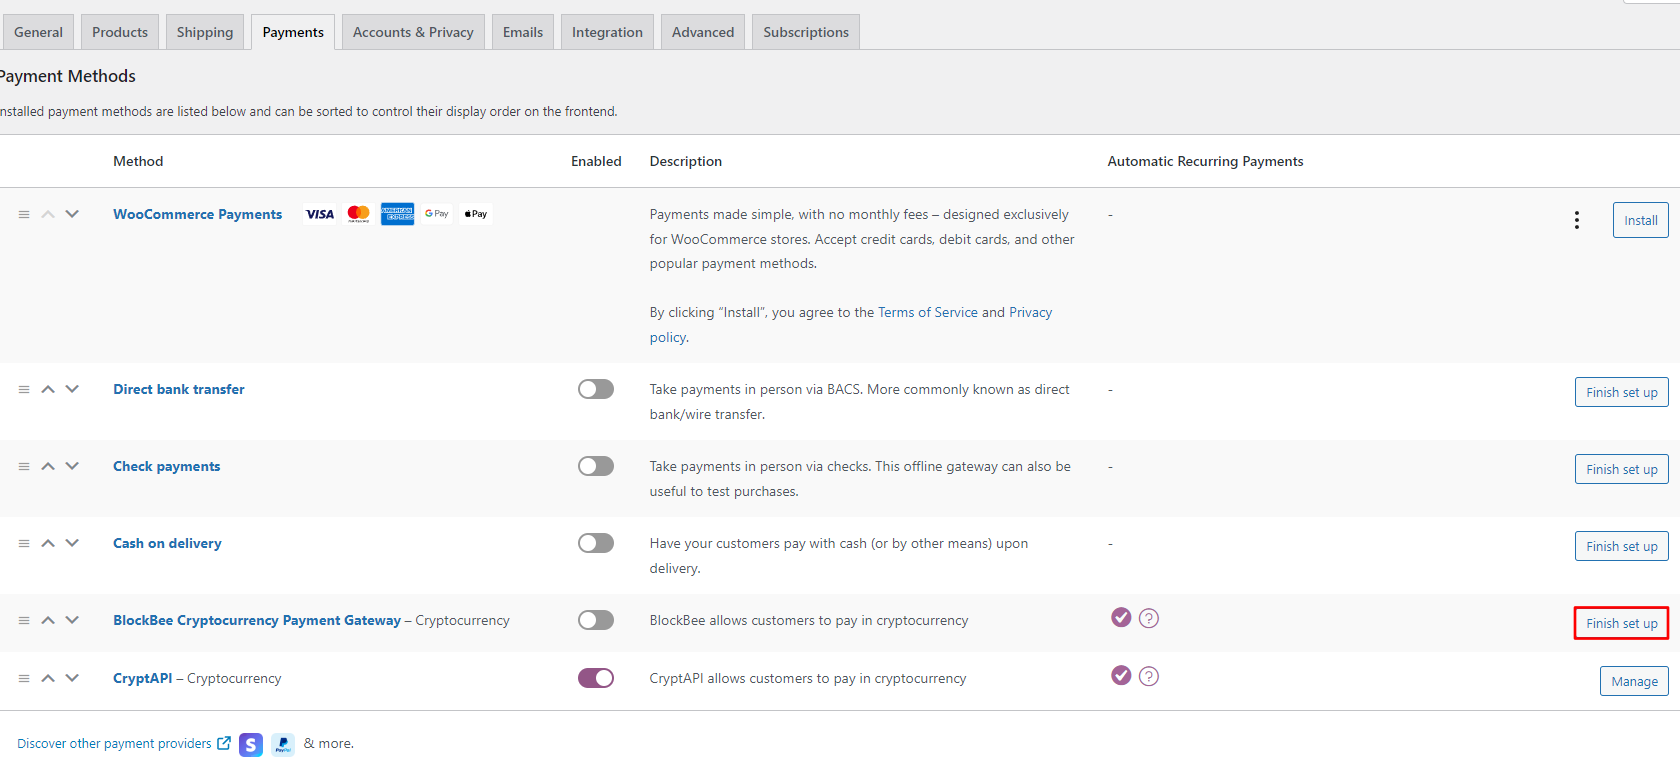
7. Here you will have to scroll to "BlockBee Cryptocurrency Payment Gateway" and click "Finish set up". This action will take you into the plug-in settings where you will finish the configuration.
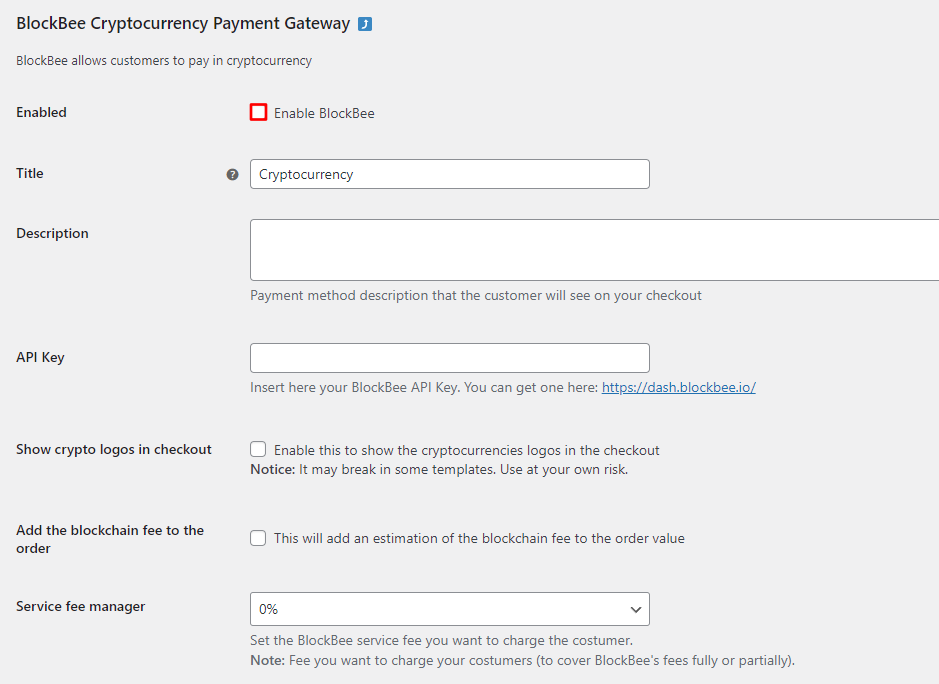
8. Make sure the checkbox it's selected, to enable BlockBee plug-in and that you get a valid API Key from our dashboard and paste it in the "API Key" field. This is mandatory, failing to do it so will result in the plug-in to error out when trying to make an order.
You can also play around the settings a bit to make our WooCommerce plug-in fit your needs.
9. Finally you must select the cryptocurrencies you wan't to accept in your WooCommerce store. You must make sure your wallet address set in the dashboard, otherwise plug-in will fail to make orders.
Note: You can select multiple ones with CTRL + click on Windows, or CMD + click on MAC.